What Is the Difference Between Prototype and Production CNC Machining?
The direct answer is that prototype CNC machining prioritizes speed, flexibility, and iterative design validation, while production CNC machining prioritizes repeatability, efficiency, and cost-per-unit reduction at volume. Prototype runs typically produce 1 to 20 parts with looser tolerances and standard materials, whereas production runs exceed 100 parts and utilize dedicated tooling and optimized processes to maintain strict tolerances. The critical shift involves transitioning from a process that tolerates design changes to one engineered to eliminate variability across thousands of identical units.
How Do the Goals of Prototype and Production Machining Differ?
The fundamental objective of prototype machining is to answer a question: does the design function as intended? This phase focuses on verifying form, fit, and function (F3) before committing to expensive hard tooling. Engineers often use prototype parts to test assembly interfaces, conduct preliminary stress analysis, and validate thermal performance, which is critical for heat sink applications. In contrast, production machining is a manufacturing discipline aimed at minimizing unit cost while maximizing throughput and quality consistency. Production goals include achieving a Six Sigma quality level, reducing scrap rates below 0.5%, and ensuring that every part from the first to the ten-thousandth matches the approved master sample.
What Are the Specific Tolerances and Surface Finish Differences?
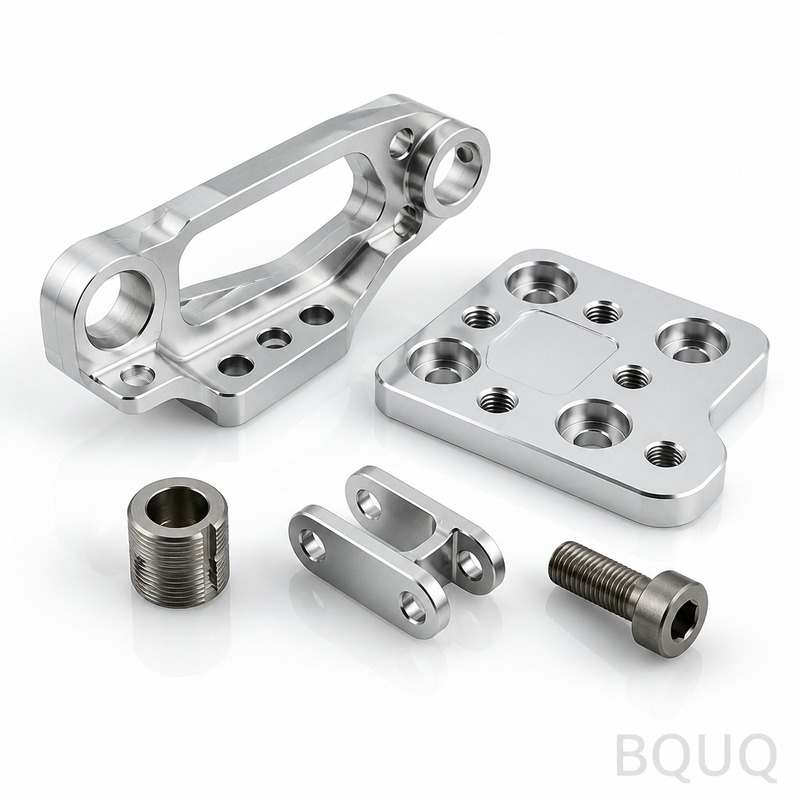
Prototype machining generally works with standard industry tolerances, typically +/- 0.1 mm (0.004 in) for linear dimensions, which is sufficient for most functional tests. This faster approach avoids the time-consuming setup required for tighter tolerances. Production CNC machining, however, employs statistical process control (SPC) to hold tolerances of +/- 0.025 mm (0.001 in) or tighter, especially for critical mating surfaces. In terms of surface finish, prototypes often settle for a standard 3.2 µm Ra (125 µin) machined finish, while production parts may require a 0.8 µm Ra (32 µin) finish for sealing surfaces or aesthetic components, achieved through optimized feed rates and specialized tooling.
| Machining Parameter | Prototype CNC Machining | Production CNC Machining |
| Typical Order Quantity | 1 - 20 parts | 100 - 100,000+ parts |
| Standard Linear Tolerance | +/- 0.1 mm (0.004 in) | +/- 0.025 mm (0.001 in) |
| Typical Surface Finish | 3.2 µm Ra (125 µin) | 0.8 µm Ra (32 µin) or better |
| Setup Time per Run | 1 - 2 hours | 4 - 8 hours (with dedicated fixtures) |
| Tooling Cost | Minimal (standard tooling) | High ($500 - $5,000+ for custom fixtures) |
| Cycle Time per Part (example) | 45 minutes | 15 minutes |
| Material Cost | Standard grades (e.g., 6061-T6) | Optimized grades with volume pricing |
| Inspection Method | Manual calipers/vernier | CMM (Coordinate Measuring Machine) & SPC |
| Lead Time for First Article | 3 - 5 business days | 2 - 4 weeks (including tooling) |
| Cost per Part (example) | $150 - $300 | $15 - $50 (at 1,000 units) |
Which Machining Strategies Are Used for Prototypes Versus Production?
Prototype machining relies heavily on 3-axis CNC milling and turning to create geometries with standard tooling libraries. The strategy is to use a single setup where possible, even if it means a longer cycle time, to reduce programming and fixturing effort. For example, a prototype heat sink might be machined from a solid block of aluminum 6061-T6 using a 3-axis mill, which is ideal for testing thermal resistance but not efficient for mass production. Production machining, conversely, implements multi-axis (4-axis and 5-axis) machining centers, custom-designed workholding fixtures, and automated pallet changers. This strategy reduces non-cut time and enables machining complex undercuts in a single operation, drastically improving throughput and positional accuracy.
How Do Lead Times and Costs Compare Between the Two Processes?
The cost difference is driven by the amortization of setup and tooling. For a prototype run of 5 parts, the setup cost, which includes programming and fixturing, is spread over only 5 parts, resulting in a high cost per unit, often $150 to $300 per part for aluminum. Production runs spread this fixed cost over thousands of parts, making the variable cost of machine time and material the dominant factor. A production run of 5,000 parts might see the cost per part drop to $15 to $50. Lead times also diverge significantly: a prototype order from BQUQ can ship in 3 to 5 business days, while a production order requires a 2 to 4 week lead time for tooling construction, process validation, and first article inspection (FAI).
Why Is Material Selection Critical in Both Phases?
In prototyping, material selection is often based on availability and machinability to quickly validate the design. Using 6061-T6 aluminum instead of the production-grade 6082-T6 is common because it is cheaper and faster to machine, and the mechanical properties are close enough for testing. However, this can be risky for thermal or structural validation because the thermal conductivity of 6061 is approximately 167 W/m·K, while a production material like copper (C11000) offers 385 W/m·K. Production machining locks in the exact material specification, including temper, grain structure, and certification (EN 10204 3.1), to ensure the final product meets regulatory and performance standards. This eliminates the risk of a prototype failing in the field due to the use of a substitute material.
When Should a Manufacturer Transition from Prototype to Production?
The transition should occur when the design is frozen, and the functional testing has been completed without requiring major revisions. A clear trigger is when the engineering change requests (ECRs) drop to zero and the prototype has passed all environmental tests, such as thermal cycling from -40°C to +125°C for automotive components. At that point, the cost of rework in production is high, so further changes must be avoided. A manufacturer should also consider the break-even point: if the anticipated volume exceeds 100 units per year and the design is stable, production machining is more economical. For quantities below this, it is often more cost-effective to continue using a rapid prototyping service, despite the higher per-unit cost, because it avoids the capital expenditure of hard tooling.
Can Prototype Machining Be Used for Low-Volume Production?
Yes, prototype CNC machining can serve as a bridge for low-volume production, typically for quantities up to 100 parts, especially for market testing or niche applications like medical devices or aerospace components. This approach, often called "rapid production," uses the same flexible setup as prototyping but with more rigorous inspection to ensure consistency. However, this strategy becomes inefficient beyond 100 parts due to the lack of automation and dedicated tooling. For example, a medical device housing requiring 50 units can be efficiently produced using prototype machining in 6061-T6 aluminum, but scaling to 5,000 units would necessitate a dedicated production cell with custom fixtures to reduce cycle time from 30 minutes to 8 minutes per part.
What Are the Key Quality Control Differences?
Prototype quality control is a manual, inspection-first process. It involves measuring critical features with calipers, micrometers, and a CMM for a few parts, with a focus on confirming the design intent rather than process capability. The goal is to catch design flaws, not process drift. Production quality control is a proactive, process-controlled system. It utilizes in-process probing, SPC charts to monitor tool wear, and 100% inspection of critical dimensions. For instance, in production, a CMM might measure every 10th part, but the machine itself uses a touch probe to automatically compensate for tool wear after every 50 cycles, maintaining a Cpk (Process Capability Index) of 1.33 or higher. This ensures that the production process is stable and predictable over long runs.
How Does BQUQ Implement These Differences in Practice?
At BQUQ, we separate our prototype and production operations into distinct manufacturing cells. Our prototype cell uses standardized vises and quick-change tooling to accelerate setup, allowing us to deliver parts in 72 hours for simple geometries. Our production cell, however, uses custom-designed fixtures specific to the part, which are machined in-house and validated to ensure repeatability over hundreds of thousands of cycles. For a recent heat sink project, we transitioned a prototype part with a tolerance of +/- 0.1 mm to production, implementing a custom vacuum fixture that reduced part deformation and allowed us to consistently hold a flatness of 0.05 mm over a 200 mm length, a requirement impossible to achieve with standard clamping in a prototype environment.
What Are the Long-Term Cost Implications of Choosing the Wrong Process?
Choosing prototype machining for high-volume needs leads to exorbitant unit costs and inconsistent part quality. The lack of process control increases scrap rates, which at a volume of 10,000 units can result in a 5% scrap rate, translating to 500 wasted parts. Conversely, using production tooling too early, before the design is finalized, results in expensive tooling modifications. A simple change in a hole location might cost $200 in a prototype, but it could cost $2,000 to modify a production fixture and reprogram a robotic cell. Therefore, the financial risk is asymmetric: prototype machining is the safest and most economical choice for design development, while production machining is the only logical choice for scaling a validated design to full market demand.
FAQ
How Many Parts Define a Prototype Run?
A prototype run typically consists of 1 to 20 parts, with the exact number depending on the number of design iterations and test requirements. For structural testing, you might need 5 identical parts, while for thermal testing, you might need only 2. The key is producing enough parts to validate the design without incurring the high cost of production tooling.
Is Prototype Machining More Expensive per Part?
Yes, prototype machining is significantly more expensive per part, often costing 5 to 10 times more than production machining for the same part. A prototype part might cost $200, while the same part in a production run of 1,000 units might cost $25. This is because the fixed costs of setup, programming, and inspection are spread over a much smaller quantity.
Can a Prototype Part Be Used as a Final Product?
A prototype part can be used as a final product for extremely low volumes, such as 10 to 20 units for clinical trials or field testing. However, this is not recommended for consumer products because the manual processes and lack of dedicated tooling result in higher variability and shorter tool life. Using a prototype part in a high-stress application increases the risk of premature failure.
How Long Does It Take to Get Production Tooling?
Production tooling, including custom fixtures and specialized cutting tools, typically takes 2 to 4 weeks to design and manufacture. This timeline is included in the overall production lead time. At BQUQ, we can sometimes expedite simple fixtures in 5 business days, but complex multi-part fixtures require the full 4-week period to ensure accuracy.
What Is the Main Risk of Skipping the Prototype Phase?
The main risk of skipping the prototype phase is discovering a fatal design flaw after you have invested in expensive production tooling. The cost of modifying a production tool is often 10 times higher than the cost of a prototype iteration. This can lead to significant project delays and budget overruns.
Which Industries Rely Heavily on Prototype CNC Machining?
Industries with stringent regulatory requirements and complex assemblies, such as medical devices, aerospace, and automotive, rely heavily on prototype CNC machining. These sectors require physical validation of components before mass production to ensure safety and compliance. For example, a surgical instrument requires multiple prototype iterations to perfect the ergonomics and cutting geometry.
When Should I Use Production Machining for a New Product?
You should use production machining when your design is frozen, your market demand is confirmed, and your projected volume exceeds 100 units. This is the point where the investment in tooling and process engineering becomes justifiable. If you are still evaluating design alternatives or conducting market testing, prototype machining is the more appropriate and cost-effective choice.
At BQUQ, with 20 years of experience in CNC machining, metal stamping, springs, and heat sinks, we help you navigate the critical transition from prototype to production, ensuring your product is manufactured efficiently and to the highest quality standards. Our engineering team can review your design for manufacturability and provide a cost analysis for both processes, allowing you to make an informed decision. We offer a 12-hour quoting service to get your project moving quickly. Contact us at sc@bquq.com or via WhatsApp at +86 13713157787, or visit our website at www.bquq.com to discuss your specific requirements.