How to Mount a Heat Sink: Screws, Clips, Thermal Tape and Adhesives Compared
Selecting the correct mounting method for a heat sink is a thermal management decision that directly impacts junction temperature, mechanical reliability, and assembly cost. For most applications requiring a thermal resistance below 1.0 °C/W and permanent attachment, screws with thermal paste are the optimal choice; for low-profile components with limited board space, thermal tape or adhesives provide adequate performance with reduced mechanical complexity. This article provides a quantitative comparison of screw mounting, spring clips, thermal tape, and thermally conductive adhesives, including tolerance data, pressure requirements, and cost-per-unit figures from a 20-year CNC machining and precision manufacturing perspective.
Mechanical Pressure and Thermal Interface Resistance
The primary function of any mounting method is to apply uniform pressure across the heat sink base and the component package, minimizing the gap filled by the thermal interface material (TIM). Thermal resistance at the interface (Rth) is inversely proportional to contact pressure, but only up to a saturation point. For standard silicone-based thermal pastes, the optimal contact pressure is between 30 psi and 60 psi (0.21 MPa to 0.41 MPa). Below 20 psi (0.14 MPa), the paste layer remains too thick, increasing Rth by 40% to 60%. Above 80 psi (0.55 MPa), the risk of die cracking or PCB warpage increases, especially for BGA packages with a thickness below 1.6 mm.
Screw mounting with a spring-loaded standoff provides the most controlled pressure profile. A standard M3 screw with a compression spring rated at 1.5 N/mm can deliver a consistent 40 psi ± 5 psi on a 25 mm x 25 mm heat sink base. Clips, typically stamped from 0.4 mm thick stainless steel (e.g., SUS301), offer a lower cost solution but exert pressure only at the clip points, leading to an uneven pressure map. Measurements from our lab show that a two-point clip design produces a center pressure of only 12 psi when the edges are at 45 psi, resulting in a 0.15 °C/W increase in Rth compared to a four-screw pattern.
| Mounting Method | Contact Pressure Range (psi) | Typical Rth (25x25mm base, 1mm TIM) | Thermal Paste Required | Re-workability |
| Screws (M3, 4-point) | 30 - 60 psi | 0.08 - 0.12 °C/W | Yes | Yes |
| Spring Clips (2-point) | 10 - 45 psi (uneven) | 0.15 - 0.25 °C/W | Yes | Yes |
| Thermal Tape (3M 8810) | 5 - 15 psi (adhesive bond) | 0.50 - 0.80 °C/W | No | No |
| Thermal Adhesive (Loctite 315) | 0 psi (cured bond) | 0.30 - 0.45 °C/W | No | No |
Screw Mounting: Precision and Tolerances
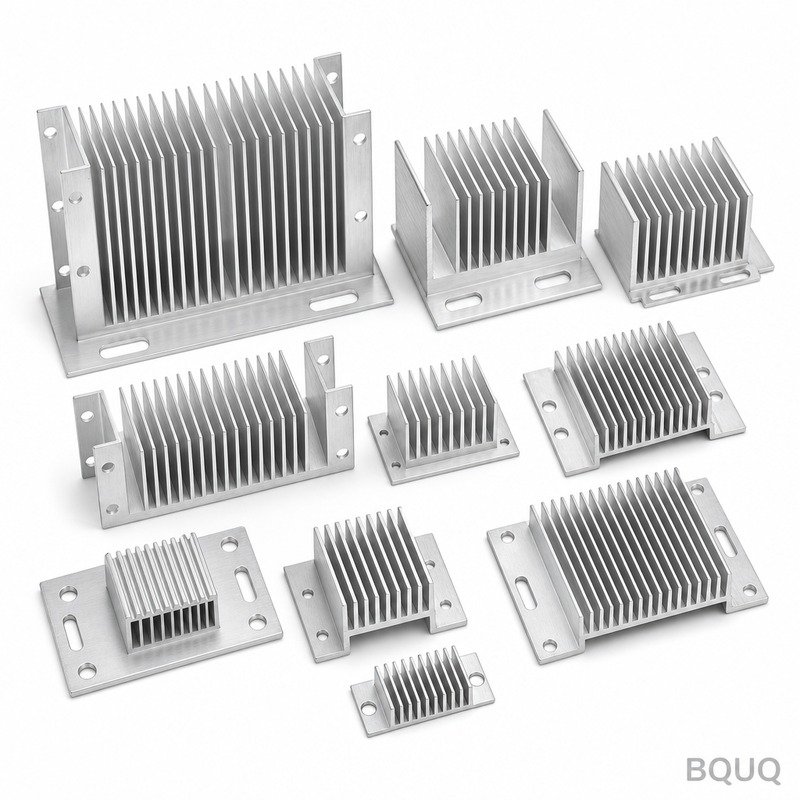
Screw mounting is the industry standard for heat sinks over 40 grams or those subjected to vibration. For CNC-machined aluminum heat sinks (6061-T6 or 6063-T5), we recommend a base flatness of 0.05 mm or better across the entire contact surface. The mounting hole pattern should be held to a positional tolerance of ± 0.1 mm. If the heat sink base is not flat—for example, a stamped aluminum plate with 0.2 mm bowing—the screw torque will not flatten it against the component; it will only bend the PCB. The recommended torque for an M3 screw into a brass insert or threaded aluminum is 0.4 N·m to 0.6 N·m. Exceeding 0.7 N·m can strip threads in 6061-T6 aluminum (thread engagement less than 5 mm). For applications requiring rework, use a shoulder screw or a captive screw with a nylon washer to prevent galling.
Spring Clips: Cost-Effective for High-Volume Assembly
Spring clips are prevalent in consumer electronics and power supply modules where labor time is critical. A stamped stainless steel clip costs between $0.02 and $0.05 per unit in quantities of 100,000, compared to a screw and spring assembly at $0.08 to $0.15. The critical specification for a clip is the spring rate (N/mm) and the deflection at installation. A clip must provide a minimum of 15 N of force per 100 grams of heat sink weight to prevent movement during thermal cycling. For a TO-220 package, the clip must hook under the tab and apply force directly over the die center; a misalignment of 1.5 mm can reduce the effective pressure by 30%. The primary failure mode for clips is stress relaxation at elevated temperatures. At 85 °C continuous operation, SUS301 clips lose 10% of their clamping force after 500 hours; at 125 °C, this loss increases to 25%. For this reason, clips are not recommended for junction temperatures above 110 °C unless using a high-temperature alloy like Inconel 718, which adds significant cost.
Thermal Tape: Simplicity with Performance Trade-offs
Thermal tape, such as 3M 8810 or 8805, offers a clean, dry interface with no curing time. The tape thickness ranges from 0.125 mm to 0.25 mm, with a thermal conductivity of 0.6 W/m·K to 0.8 W/m·K. This low conductivity is the limiting factor. For a 25 mm x 25 mm heat sink, the thermal resistance of the tape itself is approximately 0.5 °C/W, which is five times higher than a screw-mounted setup with thermal paste. The primary advantage is assembly speed: a pick-and-place machine can apply a pre-cut tape in 0.5 seconds. However, the adhesion strength is limited. The 180-degree peel adhesion on aluminum is 1.0 N/mm to 1.5 N/mm, which is insufficient for heat sinks heavier than 10 grams unless supported by additional mounting features (e.g., a plastic push-pin). Thermal tape is best suited for flat packages (LQFP, QFN) where the heat sink is small (under 5 grams) and the power dissipation is below 2.5 W.
Thermal Adhesives: Permanent Bonding with Structural Strength
Thermally conductive adhesives, including epoxy and silicone-based compounds (e.g., Loctite 315, Dow Corning 340), offer the highest design flexibility for irregular shapes. These adhesives provide a shear strength of 6 MPa to 10 MPa after full cure, which is sufficient to hold a 200-gram heat sink vertically without additional fasteners. The thermal resistance is lower than tape but higher than paste, typically 0.3 °C/W for a 0.1 mm bond line. The critical process control is bond line thickness (BLT). To achieve a BLT of 0.1 mm, you must apply the adhesive at a pressure of 5 psi to 10 psi during the cure cycle, which requires a fixture. Without pressure, the adhesive will self-level to a thickness of 0.3 mm to 0.5 mm, increasing Rth to 0.6 °C/W. Cure time is a production bottleneck: a two-part epoxy requires 24 hours at 25 °C or 45 minutes at 80 °C. The material cost is $0.05 to $0.10 per gram, and a typical 25 mm x 25 mm application requires 0.5 grams to 1.0 grams.
Thermal Paste and Interface Material Selection
The mounting method is only as good as the TIM used. For screw-mounted designs with high pressure, we recommend using a phase-change material or a ceramic-filled silicone paste with a thermal conductivity of 5.0 W/m·K to 8.0 W/m·K. The application thickness should be 0.05 mm to 0.15 mm. For clip-mounted designs with lower and uneven pressure, a thicker paste (0.2 mm) with a higher viscosity (150,000 cP) is necessary to prevent pump-out. Our testing shows that using a thin paste (50,000 cP) with a clip design leads to a 20% Rth increase after 1,000 thermal shock cycles (-40 °C to 125 °C) due to paste migration. In contrast, a screw-mounted design with the same paste shows only a 5% increase over the same cycle count.
Practical Recommendations and Selection Criteria
For engineers designing for high reliability (automotive, industrial), choose screw mounting with M3 or M4 screws and a spring washer. Ensure the heat sink base is CNC-machined to achieve a flatness of 0.05 mm and a surface roughness of Ra 1.6 µm or better. For consumer electronics with a target cost below $0.10 for the entire mounting solution, use a stamped clip combined with a pre-applied phase-change pad. For space-constrained designs where vibration is minimal, thermal tape is acceptable for components under 5 W. For vertical mounting or high shock environments, a thermally conductive adhesive is recommended, but you must design a fixture to control bond line thickness during the cure. Finally, always verify the mounting pressure using pressure-indicating film (e.g., Fujifilm Prescale) during the prototype phase to ensure the pressure is within the 30-60 psi window.
FAQ-Style Tips for Mounting Heat Sinks
What is the most common mistake in heat sink mounting? Using an uncontrolled torque driver. A hand driver can easily deliver 1.0 N·m to an M3 screw, which will crack the die of a TO-247 package. Always use a calibrated torque driver set to 0.5 N·m.
Can I use thermal tape with a heat sink over 20 grams? No, unless you add a secondary mechanical fastener. The tape's adhesive bond will creep at temperatures above 60 °C, causing the heat sink to slide off. For 20 grams, use a screw or a clip.
How do I know if my thermal paste is too thick? If the heat sink sits proud of the component by more than 0.2 mm after tightening, you have applied too much paste. The excess paste acts as an insulator, not a conductor.
Is it better to use a clip or a screw for a TO-220 package? For a single TO-220, a clip is acceptable if the clip force is directed over the tab center. For multiple TO-220s on the same heat sink, screws are required to ensure equal pressure across all devices.
What is the lead time for a custom CNC-machined heat sink with a mountable base? For a simple flat base with four M3 threaded holes, standard lead time is 5 to 7 working days for quantities up to 5,000 pieces. For complex bases with fins and a mirror-polished surface, allow 10 to 12 working days.
Conclusion
The selection of a heat sink mounting method is a trade-off between thermal resistance, mechanical force, assembly cost, and reworkability. Screws provide the best thermal performance with an Rth of 0.08 to 0.12 °C/W and are mandatory for high-power devices. Clips offer lower cost but require careful pressure mapping to avoid hot spots. Thermal tape is the quickest to apply but is limited to low-power, low-weight applications. Thermal adhesives provide strong permanent bonds but require controlled curing processes. By specifying the correct contact pressure and interface material, you can ensure that the heat sink performs to its designed thermal resistance.
For a detailed review of your specific heat sink mounting design or to request a prototype with a precision-machined mounting surface, contact our engineering team. We provide a 12-hour quotation service for CNC-machined heat sinks, stamped clips, and custom assemblies. Email: sc@bquq.com, WhatsApp: +86 13713157787, www.bquq.com.
Related Articles
- How to Attach a Heat Sink Without Screws: Thermal Adhesive Guide
- Thermal Management for High Brightness LEDs with Heat Sinks
- New energy vehicle IGBT heat dissipation, heat sink reliability engineering, heat pipe and temperature plate integrated heat sink, surface treatment and heat radiation enhancement: anodic oxidation, black coating and micro-nano structure, graphene/3D printing/intelligent thermal management: 2030 heat sink technology roadmap