Why Do Stamped Parts Have Tooling Marks and Is That Normal?
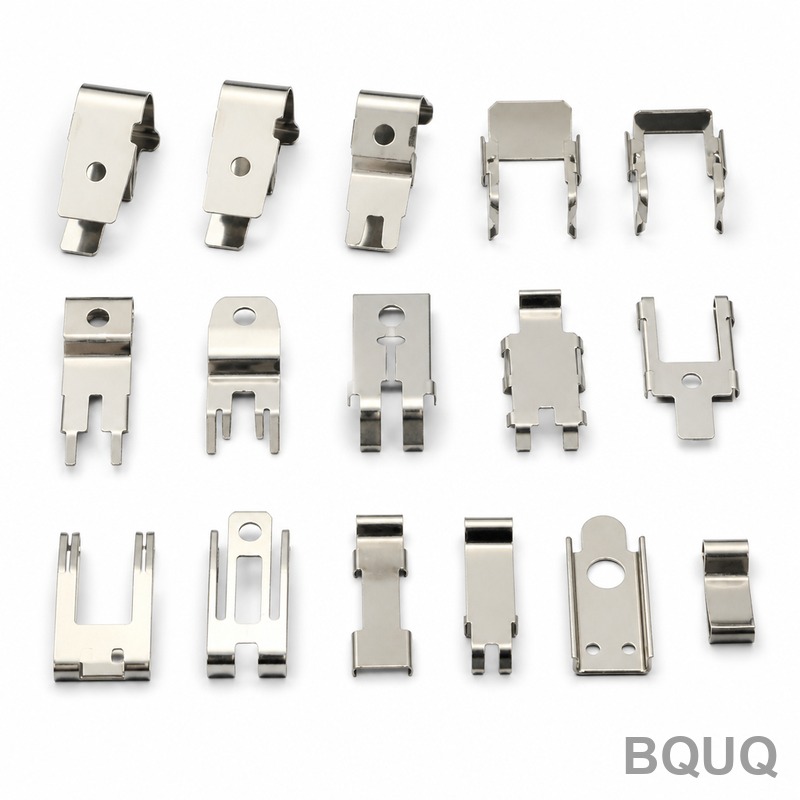
Stamped parts have tooling marks because the die physically contacts the sheet metal under high pressure to shear, form, and bend it, leaving microscopic or visible impressions from the tool surface, wear, and clearance gaps. Yes, this is completely normal and expected in all metal stamping processes, from prototype to high-volume production. The presence of tooling marks does not indicate a defect, but rather confirms that the part was manufactured using a defined die geometry, and the specific mark types (burnish, break, rollover, or die wear lines) are governed by material grade, tool steel quality, and stamping parameters that BQUQ controls to within 0.01 mm.
What Are the Specific Types of Tooling Marks on Stamped Parts?
The stamping process creates five distinct, predictable mark categories. The first is rollover, a rounded edge where the punch first contacts the sheet, typically measuring 5% to 10% of material thickness. The second is the burnish zone, a smooth, shiny area created by the punch pushing through the material, which represents 20% to 30% of the sheared edge on a standard 1.5 mm thick SPCC steel sheet. The third is the break zone, a rougher, angled fracture surface that accounts for the remaining 50% to 70% of the edge, and the fourth is the burr, a small raised lip on the bottom edge that should measure less than 0.05 mm for standard tooling. The fifth mark type is die wear lines, which appear as light scratches or polished streaks on the formed surface after 10,000 to 50,000 strokes, reflecting normal tool steel degradation.
How Do Tooling Marks Differ Between Blanking, Forming, and Deep Drawing?
Blanking and piercing operations produce the edge-specific marks (rollover, burnish, break, burr) because they involve shearing fracture. Forming operations, such as bending or flanging, create marks from the die radius and punch nose, which are typically compression lines or slight surface indentations, and these are usually limited to a depth of 0.02 mm to 0.05 mm. Deep drawing, which stretches material over a die radius, generates friction-induced marks called "orange peel" or die pickup, especially on aluminum alloys like 5052, where the surface roughness increases from an initial Ra 0.4 µm to Ra 1.2 µm after 500 parts if lubrication is insufficient. In contrast, coining and embossing operations intentionally imprint the die texture onto the part, so the tooling mark is the feature itself, and surface roughness on coined areas can be held to Ra 0.8 µm or better.
Which Tooling Parameters Determine the Severity of Marks?
The primary parameter is die clearance, which is the gap between punch and die, normally set at 5% to 10% of material thickness for carbon steel, 4% to 6% for stainless steel, and 8% to 12% for aluminum. A tighter clearance (below 5%) increases the burnish zone percentage and reduces the burr height, but it also accelerates tool wear and can create a secondary shear mark that looks like a crack. The second parameter is tool steel grade: D2 tool steel, hardened to 58-62 HRC, will show less wear after 100,000 strokes than A2 at 54-58 HRC, while carbide tooling (90 HRA) can run 1,000,000 strokes before visible wear lines appear. The third parameter is press speed and lubrication, where running a 60-ton press at 80 SPM versus 120 SPM reduces the impact force and lowers the risk of galling, and using chlorine-free lubricants with a film strength of 500 MPa reduces tool pickup by up to 40%.
How Much Tooling Mark Variation Is Acceptable Per Industry Standards?
Industry standards from the Precision Metalforming Association (PMA) and ISO 2768-1 define acceptable burr height as less than 10% of material thickness, which for a 2.0 mm thick part means maximum 0.2 mm. For surface finish on visible panels, a Ra value of 1.6 µm is standard for automotive interior brackets, while exterior body panels require Ra 0.8 µm or better, which is achievable with polished die surfaces of Ra 0.2 µm. Dimensional tolerance of the overall part is typically ±0.10 mm for standard stamping, but features that are directly affected by tooling wear, such as hole diameter, may shift by 0.03 mm over 50,000 strokes and still remain within specification. BQUQ validates these values using a CMM (coordinate measuring machine) with 0.002 mm resolution and a surface roughness tester compliant with ISO 4287.
Can Tooling Marks Be Removed or Reduced After Stamping?
Yes, post-processing can reduce or eliminate visible tooling marks, but the method depends on the mark type and the production volume. For burrs, a vibratory finishing process using ceramic media for 30 to 60 minutes removes burrs down to 0.02 mm, at a cost of approximately $0.05 to $0.15 per part. For surface scratches or die wear lines, barrel polishing or abrasive belt sanding with a 400-grit belt can achieve Ra 0.4 µm, but this adds 15 to 30 seconds of cycle time per part. For critical cosmetic surfaces, a secondary operation called "coining" or "ironing" can be performed, where the part is pressed again in a die with a mirror-polished surface (Ra 0.1 µm) to flatten the material and remove marks, but this increases tooling cost by 20% to 35% and is only economical for volumes above 50,000 parts per year. Alternatively, painting or powder coating with a thickness of 60 to 80 µm will hide tooling marks up to Ra 1.6 µm without any mechanical finishing.
How Does Tooling Cost Relate to the Presence of Marks?
Tooling cost directly determines the starting quality of the die surface and, therefore, the initial tooling marks. A basic progressive die for a simple bracket costs $3,000 to $8,000, uses standard EDM (electrical discharge machining) finish of Ra 1.6 µm, and will produce visible machine lines on the formed area. A premium die for a cosmetic part costs $12,000 to $25,000, includes hand-polished surfaces (Ra 0.4 µm) and hardened inserts, and will produce parts with no visible marks for the first 100,000 strokes. For deep-drawn parts, tooling costs rise to $30,000 to $60,000 because the die requires multiple stations, gas springs, and special coatings like titanium nitride (TiN) that reduce friction and mark formation. The table below shows typical tooling grades and their corresponding mark characteristics:
| Tooling Grade | Tool Steel | Hardness (HRC) | Surface Finish (Ra) | Expected Tooling Marks | Tooling Cost (USD) |
| Economy | A2 | 54-58 | 1.6 µm | Visible burnish and break lines | $3,000 - $8,000 |
| Standard | D2 | 58-62 | 0.8 µm | Minor wear lines after 50k strokes | $8,000 - $15,000 |
| Premium | M2 or Carbide | 62-66 or 90 HRA | 0.4 µm | No visible marks up to 100k strokes | $15,000 - $30,000 |
| Cosmetic | Carbide + TiN coating | 90 HRA | 0.2 µm | Mirror finish, marks only on edge break | $30,000 - $60,000 |
Why Do Some Stamped Parts Show Rust or Discoloration Near Tooling Marks?
Tooling marks, particularly the break zone, expose fresh, unoxidized metal that is more chemically reactive than the original sheet surface. During stamping, the high pressure (up to 200 MPa) and friction can locally heat the material to 150°C to 300°C, which accelerates oxidation and can create a blue or brown discoloration on the burnish zone. If the lubricant is not fully removed after stamping, it can trap moisture in the micro-cracks of the break zone, leading to surface rust within 24 to 48 hours in humid environments (above 60% relative humidity). To prevent this, BQUQ applies a rust-preventive oil (VCI, vapor corrosion inhibitor) within 2 hours of stamping, and for parts requiring painting, a phosphate conversion coating is applied to seal the surface. This is not a defect in the stamping process but a material property that requires proper post-stamping handling.
How Should Engineers Specify Tooling Mark Requirements on Drawings?
Engineers should clearly distinguish between functional and cosmetic surfaces on the drawing to avoid unnecessary cost. For functional surfaces, specify a maximum burr height of 0.05 mm and a surface roughness of Ra 1.6 µm, and note that minor tooling marks are acceptable per PMA standards. For cosmetic surfaces, add a note stating "visible surfaces to be free of scratches, die lines, and orange peel" and specify Ra 0.8 µm, but be prepared for a 15% to 25% increase in unit cost due to secondary finishing. It is also critical to specify the die material and hardness on the tooling quotation, as requesting D2 steel with 60-62 HRC will ensure consistent marks over a longer production run. Finally, request a "first article" approval with boundary samples that show the maximum acceptable mark state, so that both the factory and the customer have a physical reference for future production.
FAQ
Can Tooling Marks Ever Be Considered a Rejectable Defect?
Yes, tooling marks are rejectable when they exceed the specified burr height (over 0.1 mm for a 1.5 mm sheet), when they cause surface cracks or tears in the material, or when they are located on a sealed or mating surface where they could cause leakage or stress concentration. Also, if the marks are caused by broken or chipped tooling, which produces a sudden change in part geometry, the entire batch must be quarantined and inspected.
What Is the Typical Lead Time to Modify Tooling to Reduce Marks?
Modifying a die to reduce tooling marks, such as polishing the die surface or adjusting the clearance, typically takes 3 to 7 working days for a simple single-station die and 2 to 3 weeks for a progressive die with multiple stations. The cost for polishing is $300 to $800 per die, while re-cutting a new punch and die set to change clearance costs $1,500 to $4,000. This is always faster and cheaper than re-tooling from scratch, which takes 4 to 8 weeks.
Does the Material Grade Affect How Visible the Tooling Marks Are?
Yes, softer materials like 1100 aluminum and low-carbon steel (SPCC) show more pronounced rollover and burr marks because they deform plastically before shearing. Harder materials like 301 stainless steel or 65Mn spring steel exhibit cleaner shear edges with smaller burrs but can show more die wear lines due to higher abrasiveness. Brass and copper show the most visible burnish zones, which are very shiny and can be mistaken for scratches.
How Many Parts Can Be Produced Before Tooling Marks Become Excessive?
For a standard D2 tool steel die, expect acceptable tooling marks for 100,000 to 300,000 strokes on low-carbon steel up to 2 mm thick. After this point, the burr height will exceed 0.1 mm and the die must be sharpened, which involves grinding the punch and die face, adding 0.5 to 1.0 mm of stock for re-sharpening. Carbide dies can run 1,000,000 to 2,000,000 strokes before re-sharpening is needed.
Can Tooling Marks Be Eliminated Entirely in Mass Production?
No, it is physically impossible to eliminate all tooling marks in metal stamping because the process relies on mechanical contact and fracture. Even with carbide tooling and polished surfaces, a microscopic burr of 0.01 mm and a burnish zone will always exist. The goal is to control the marks within a specified tolerance, not to eliminate them.
Is It Normal for Tooling Marks to Change Over Time During a Production Run?
Yes, tooling marks evolve as the die wears. In the first 1,000 strokes, the die surface "runs in" and marks may become less visible as high spots are polished away. After 10,000 to 50,000 strokes, wear lines begin to appear and burr height gradually increases. This is a normal, predictable pattern, and a good stamping supplier will monitor part dimensions at regular intervals (every 5,000 strokes) and schedule preventative maintenance before the marks exceed specification.
What Is the Cost Difference Between a Part with Tooling Marks and a Fully Finished Part?
A standard stamped part with acceptable tooling marks costs $0.10 to $0.50 per piece, depending on material and size. The same part with secondary finishing to remove marks, such as vibratory deburring and polishing, costs $0.15 to $0.70 per piece. If the part requires a cosmetic class-A surface via additional coining and polishing, the cost can rise to $0.50 to $1.50 per piece, which is why engineers should only specify cosmetic finishes where functionally required.
Tooling marks are an inherent, controllable characteristic of the metal stamping process, and understanding their types, causes, and acceptable limits is essential for cost-effective part design. By specifying realistic tolerances (burr under 0.05 mm, Ra under 1.6 µm for functional surfaces) and selecting the appropriate tooling grade (D2 or carbide) based on volume, engineers can avoid unnecessary secondary operations and reduce part cost by up to 30%. BQUQ has 20 years of experience in CNC machining, metal stamping, and tooling design in Dongguan, and we are ready to review your drawings and provide tooling recommendations. For a quotation within 12 hours, email your 2D/3D files to sc@bquq.com, or contact us on WhatsApp at +86 13713157787. Visit www.bquq.com for more information on our stamping capabilities and quality certifications.
Related Articles
- Intelligent online inspection and closed-loop quality control: creating a zero-defect production line for stamped parts
- Stamping digital factory and simulation-driven design: from virtual prototype to digital twin operation
- High-speed precision stamping and in-die microforming technology: from electronic connections to micromotor cores