How Long Does It Take to Make a Stamping Die?
A typical stamping die for a production part requires 4 to 12 weeks to manufacture, with the average simple die taking 4 to 6 weeks and a complex progressive die taking 8 to 12 weeks. This timeline includes design, material procurement, CNC machining, heat treatment, assembly, and tryout, but excludes the initial feasibility analysis which adds 1 to 2 weeks. For urgent projects, a simplified prototype die can be produced in 3 to 4 weeks, though it will have a shorter service life and lower tolerance capability.
What Factors Most Significantly Affect Stamping Die Lead Time?
The single largest factor is die complexity, which dictates the number of stations, the precision of the guiding system, and the amount of CNC machining required. A simple blanking die with one station may only need 40 to 60 hours of machining, while a 12-station progressive die can require over 300 hours of 5-axis CNC work. The second major factor is material availability; standard tool steels like D2 or A2 are usually in stock, but proprietary grades such as powder metallurgy steels (e.g., Vanadis 4 Extra) require 2 to 3 weeks for delivery from mills. Third, the required tolerance level matters: dies held to ±0.01 mm require wire EDM and jig grinding, which are slower processes than conventional milling, adding 30% to 50% more time. Finally, the availability of your engineering team for design approvals and the current workload of the die shop can shift the schedule by 1 to 2 weeks in either direction.
How Does Die Type Change the Production Timeline?
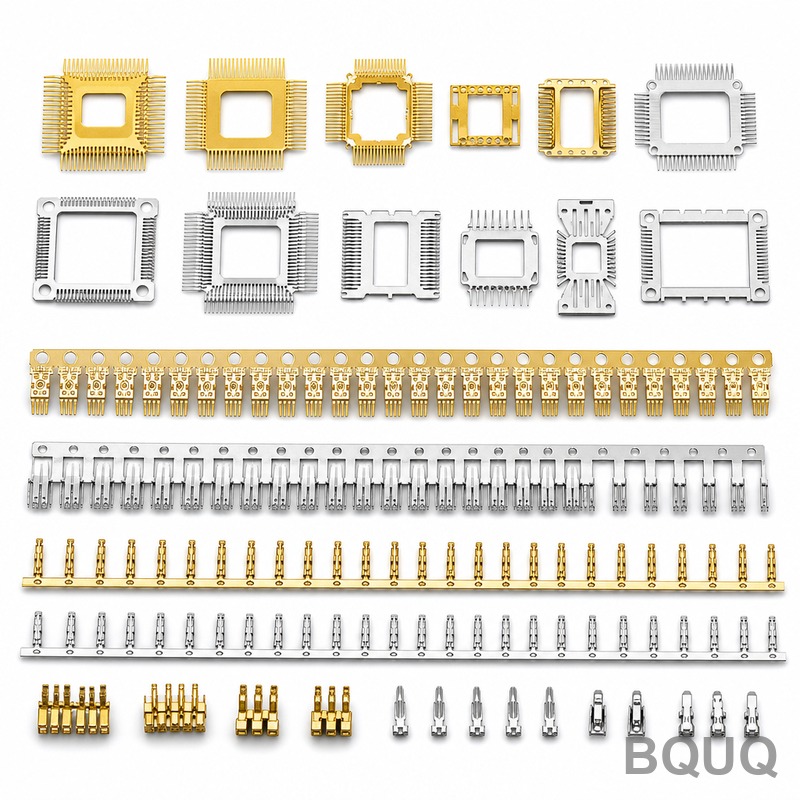
The die type directly determines the manufacturing process sequence and the total hours required. A simple blanking die, used for flat parts, involves only a punch, a die button, and a stripper; this can be machined and assembled in 3 to 4 weeks. A compound die, which performs blanking and piercing in one stroke, adds a movable stripper and more precise alignment, extending the timeline to 5 to 7 weeks. A progressive die, which performs multiple operations (piercing, forming, cutting) in a single strip feed, is the most complex and typically takes 8 to 12 weeks because each station must be individually machined, fitted, and tested for strip feed accuracy. A transfer die, which uses a robotic arm to move parts between stations, is similar in complexity to a progressive die but adds automation design time, often pushing the timeline to 10 to 14 weeks. For reference, a typical progressive die for a small electronic connector contains 10 to 15 stations, each with a tolerance of ±0.005 mm for the cutting edges.
Which Machining Processes Dominate the Die Manufacturing Schedule?
Wire EDM (Electrical Discharge Machining) and precision CNC milling together consume about 60% of the total manufacturing time. Wire EDM is used to cut the hardened steel die profiles, and for a complex progressive die, the wire cutting alone can take 5 to 7 working days, running 24 hours a day. CNC milling of the die blocks, including the cavity and the mounting surfaces, typically takes 2 to 4 days depending on the number of cavities. Grinding operations, especially surface grinding to achieve flatness within 0.005 mm, add another 1 to 2 days. Heat treatment, which involves hardening the die steel to 58-62 HRC, takes 2 to 3 days including the quenching, tempering, and stress-relieving cycles. The final fitting and tryout stage, where the die is installed in a press and test parts are produced, typically takes 3 to 5 days because it involves iterative adjustments to the punch-to-die clearance, which for 1.5 mm thick stainless steel is 0.03 mm per side.
How Long Does the Design and Engineering Phase Take?
The design phase takes 1 to 3 weeks, depending on whether a similar die exists in our library. For a new progressive die, our engineers spend 3 to 5 days on strip layout design, which determines the sequence of stations and the pitch distance (typically 20 to 50 mm). Then, 2 to 3 days are spent on 3D modeling and simulation, including finite element analysis (FEA) of the forming steps to predict springback, which for high-strength steel can be 2 to 5 degrees. A design review with the customer, which is mandatory for parts with tolerances tighter than ±0.05 mm, takes 1 to 2 days for feedback and revisions. If the part has been produced before, the design phase can be shortened to 3 to 5 days by reusing the existing 3D models and adjusting for minor changes. In total, for a typical medium-complexity die, the engineering phase accounts for 20% of the total lead time.
What Is the Typical Cost Breakdown for a Stamping Die?
The cost of a stamping die ranges from USD 3,000 for a simple blanking die to USD 80,000 for a large, multi-station progressive die for automotive body panels. For a medium-complexity progressive die for a bracket or a heat sink, the price is typically USD 15,000 to USD 40,000. The material cost (tool steel, guide pins, springs) represents 25% to 30% of the total. The machining and EDM labor represents 40% to 50%, and the assembly, fitting, and tryout represents the remaining 20% to 30%. Heat treatment is a relatively small cost at 5% to 8% but is critical for die life. For example, a die made of D2 steel hardened to 60 HRC will last for 500,000 to 1,000,000 strokes, while a die made of powder metallurgy steel (e.g., ASP 2023) hardened to 64 HRC can last for 2,000,000 strokes or more, justifying the higher initial material cost.
| Die Type | Typical Lead Time | Cost Range (USD) | Tolerance Capability | Expected Die Life (Strokes) |
| Simple Blanking Die | 3-4 weeks | 3,000 - 8,000 | ±0.05 mm | 200,000 - 500,000 |
| Compound Die | 5-7 weeks | 8,000 - 20,000 | ±0.02 mm | 500,000 - 1,000,000 |
| Progressive Die (Medium) | 8-10 weeks | 15,000 - 40,000 | ±0.01 mm | 1,000,000 - 2,000,000 |
| Progressive Die (Complex) | 10-12 weeks | 40,000 - 80,000 | ±0.005 mm | 2,000,000 - 5,000,000 |
| Transfer Die (Large) | 10-14 weeks | 50,000 - 150,000 | ±0.02 mm | 1,500,000 - 3,000,000 |
Why Is the Tryout and Sampling Stage Critically Important?
The tryout stage, which takes 3 to 5 days, is where the theoretical design meets physical reality and is non-negotiable in the timeline. During tryout, the die is installed in a press (typically 45 to 250 tons), and test strips are fed through to check for dimensional accuracy, burr height, and surface finish. Burr height on a stamped part should be less than 10% of the material thickness; for 1.0 mm steel, this means a maximum burr of 0.1 mm. If the part shows springback, the die must be modified by adding coining steps or adjusting the bend angle compensation, which can take 1 to 2 extra days. The tryout also validates the strip feed accuracy, which must be within ±0.1 mm to prevent misfeeds. Skipping or shortening this stage is the leading cause of premature die failure or inconsistent part quality during production, so our process mandates a minimum of two successful sampling runs of 300 parts each before approval.
When Should You Consider Rapid Prototyping Dies to Shorten the Timeline?
If you need sample parts within 2 to 3 weeks for design validation or marketing purposes, a rapid prototyping die is the appropriate choice. These are typically made from softer materials like P20 steel or even aluminum, which can be machined in 2 to 3 days and do not require heat treatment. The trade-off is a die life of only 500 to 2,000 strokes, which is sufficient for 50 to 200 sample parts, but not for production. The cost of such a die is 20% to 30% lower than a production die, and the tolerance is limited to ±0.1 mm. We recommend this approach only when the final part geometry is confirmed; if you expect design changes, it is more economical to wait for the full production die. For high-volume parts (over 100,000 units), a rapid prototype die is never cost-effective because the per-part cost becomes prohibitive compared to a hardened die.
What Are the Common Questions About Stamping Die Production?
Can a Stamping Die Be Made Faster Than 4 Weeks?
Yes, but only for very simple blanking dies with no forming steps and with readily available standard steel. In an emergency, we can dedicate a single CNC machine and a wire EDM operator to the job, completing it in 2.5 to 3 weeks, but this incurs a 15% to 20% rush surcharge. This approach is not feasible for progressive dies because the sequential fitting of stations cannot be meaningfully accelerated without sacrificing quality.
How Long Does the Initial Quotation and Feasibility Review Take?
The quotation for a stamping die typically takes 1 to 2 business days, provided we receive a 3D model (STEP or IGES) and the material specification. A full feasibility review, including a preliminary strip layout and cost breakdown, takes an additional 3 to 5 business days. We offer this feasibility review free of charge for potential production orders.
Which Material Is Fastest to Machine for a Stamping Die?
Pre-hardened P20 steel (28-32 HRC) is the fastest to machine because it requires no post-machining heat treatment, saving 2 to 3 days. However, P20 is only suitable for low-volume production (under 50,000 strokes). For production dies, D2 or A2 tool steel is standard, but the heat treatment cycle adds 2 to 3 days to the schedule.
Why Does a Progressive Die Cost More Than a Single-Station Die?
A progressive die costs 3 to 5 times more because it contains multiple precision stations, each requiring its own punch, die insert, and stripper component, all with tolerances of ±0.005 mm. The engineering design time is also significantly higher, as the strip layout must be optimized to prevent distortion. The higher initial cost is offset by lower per-part cost at volumes above 100,000 units.
When Is a Transfer Die Preferred Over a Progressive Die?
A transfer die is preferred when the part has deep draws or complex 3D shapes that cannot be achieved with a continuous strip because the material would tear. Transfer dies are also used for very large parts, such as automotive door panels, where the strip width would be impractical. The lead time for a transfer die is 2 to 4 weeks longer than a comparable progressive die due to the automation system design.
How Does Part Thickness Affect Die Manufacturing Time?
Thicker materials, such as 3.0 mm steel, require larger clearances (0.15 mm per side) and more robust die components, which increases machining time by 10% to 20%. Thinner materials, such as 0.2 mm brass, require extremely precise punch-to-die alignment (within 0.005 mm) and often necessitate wire EDM and optical grinding, which adds 2 to 3 days to the schedule.
Can We Start Production While the Hardened Die Is Being Manufactured?
No, because the production die is the sole source for the final part geometry. However, we can produce a limited number of soft tooling samples (up to 200 parts) for your assembly trials while the production die is being built. This parallel path saves 2 to 3 weeks in your overall product development schedule.
In conclusion, the realistic timeline for a stamping die is 4 to 12 weeks depending on complexity, with the engineering and tryout stages being the least compressible. For a successful project, we recommend starting the die design in parallel with your part design finalization and allocating at least 2 weeks for the sampling and approval process. Our team at BQUQ has 20 years of experience in CNC machining and die manufacturing for heat sinks, springs, and metal stampings. To get an accurate lead time and quotation for your specific part, send your 3D drawing to sc@bquq.com or message us on WhatsApp at +86 13713157787. We provide a formal quotation and lead time commitment within 12 hours of receiving your inquiry, and you can review our capabilities at www.bquq.com.