What Is Progressive Die Stamping? How Multi-Stage Dies Work Explained
Progressive die stamping is a high-speed metal forming process where a coil strip is fed through a single press with a multi-station die, completing multiple operations (cutting, bending, drawing, coining) in one continuous stroke. Each press stroke advances the strip by a precise pitch, and every station performs a sequential step until the finished part is ejected from the final station. This method achieves production rates of 200 to 1,500 parts per minute with tolerances held to ±0.025 mm, making it the most cost-effective choice for high-volume precision components.
How Does a Progressive Die Work Step by Step?
The process begins with a coil of sheet metal, typically 0.1 mm to 6.0 mm thick, fed into a press equipped with a progressive die. The die contains a series of stations, each performing a distinct operation: piloting, blanking, piercing, forming, drawing, and final cutoff. The strip is advanced by a feeder mechanism, usually a servo roll feeder, which indexes the material precisely to the next station with each press stroke.
At the first station, pilots engage pre-pierced holes to locate the strip accurately, ensuring positional repeatability within ±0.005 mm. Subsequent stations add features incrementally: a lance cuts partial contours, a form station bends a flange to a specific angle, and a draw station creates a cup or emboss. The final station separates the finished part from the strip via a cutoff or blanking operation. Because all operations occur simultaneously on different stations of the same strip, the cycle time equals the press stroke rate, eliminating separate handling between steps.
What Operations Can a Progressive Die Perform?
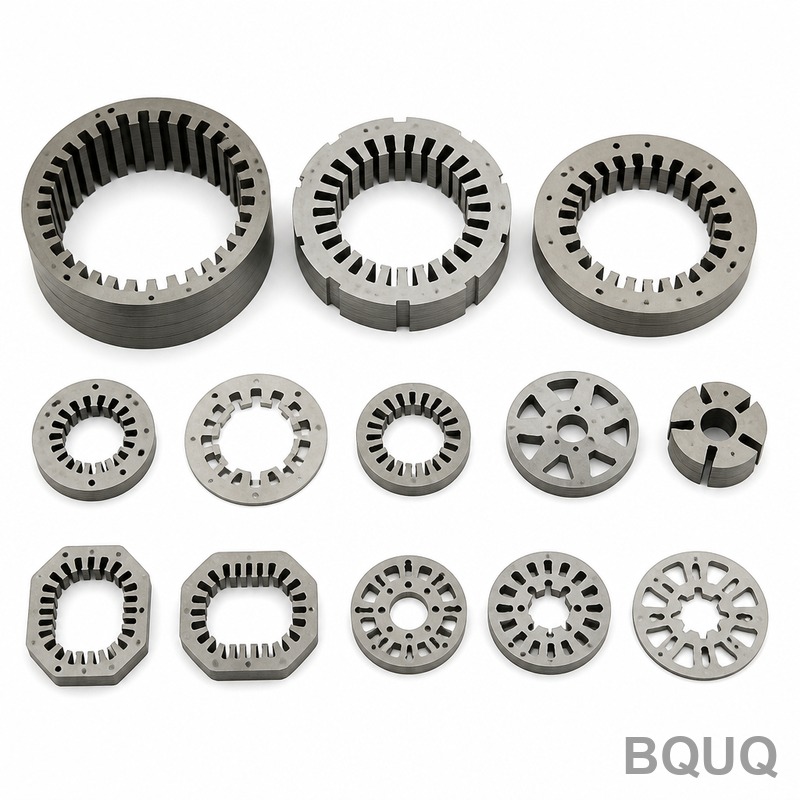
A progressive die can combine multiple forming and cutting operations in a single tool. Common operations include blanking (cutting outer contours), piercing (making holes), lancing (partial cutting and bending), bending (V-bend, U-bend, hemming), drawing (deep or shallow cups), coining (compressing surface detail), and embossing (raising or recessing features). Advanced dies also perform thread tapping, side piercing, and cam-driven operations for undercuts.
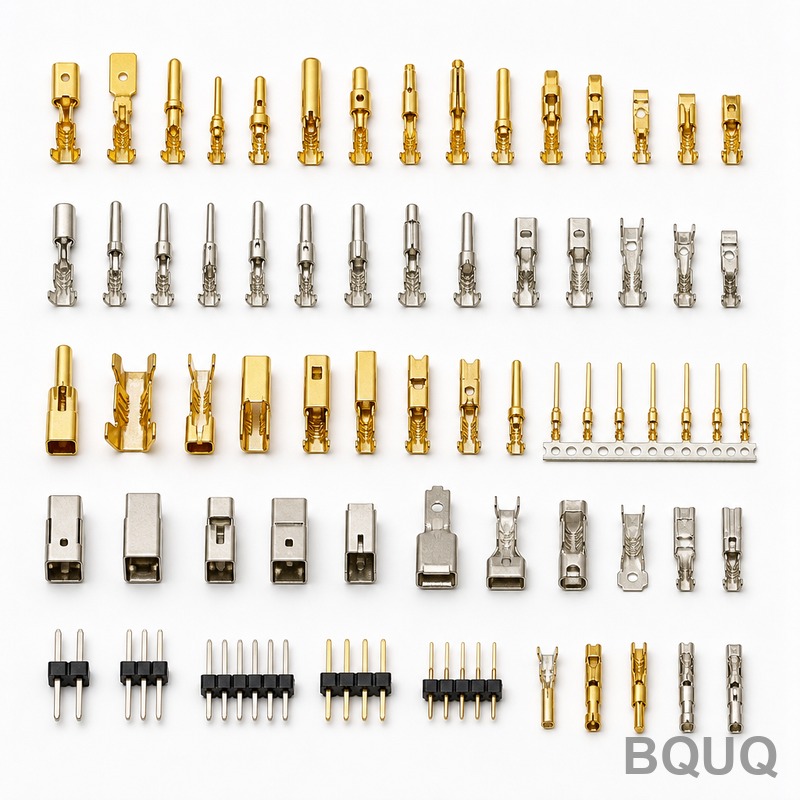
For example, a typical electrical connector terminal may require 12 operations: pilot hole piercing, edge trimming, four separate bends, a lancing cut, a coining step for contact point hardness, and final cutoff. The strip thickness for such parts is usually 0.2 mm to 0.5 mm copper alloy, and the die has 14 to 20 stations. The maximum draw depth in a progressive die is limited to about 70% of the strip width per station, requiring multiple draw stations for deeper parts.
Why Choose Progressive Die Stamping Over Other Methods?
Progressive die stamping is selected over single-stage stamping, CNC machining, or metal injection molding (MIM) when production volumes exceed 50,000 parts per year. The primary advantage is unit cost: at 500,000 parts, a progressive die part costs $0.02 to $0.15 each, versus $0.80 to $2.50 for CNC machining of the same geometry. Secondary benefits include consistent repeatability (all parts from one coil share identical dimensional characteristics), minimal operator intervention (the process is fully automated), and reduced material waste (strip layout nests parts closely, achieving 65% to 85% material utilization).
Compared to multi-slide stamping, progressive dies offer tighter tolerances (±0.025 mm vs ±0.05 mm) and better suitability for parts requiring flatness control. Compared to fineblanking, progressive stamping is faster and less expensive for parts thinner than 3.0 mm, but fineblanking achieves smoother shear edges. For parts with complex 3D forms, progressive dies are preferred when the strip can be oriented to allow forming without material tearing, which depends on bend radii greater than 0.5 times the material thickness.
Which Materials Are Best Suited for Progressive Die Stamping?
The best materials for progressive die stamping are those with high ductility, uniform thickness, and consistent hardness. Common choices include low-carbon steel (SPCC, DC01) for structural parts, stainless steel (SUS301, SUS304) for corrosion-resistant components, aluminum alloys (5052, 6061) for lightweight heat sinks and brackets, copper alloys (C1100, C17200 beryllium copper) for electrical contacts, and nickel-silver alloys for spring contacts. Material hardness typically ranges from 80 to 200 HV for forming, with harder materials requiring more tonnage and causing faster die wear.
Strip width ranges from 5 mm to 600 mm, and coil weight up to 10 tons is standard. For high-strength applications, press-hardened steel (22MnB5) can be stamped at elevated temperatures (850°C to 950°C) in a warm-stamping variant, but this requires specialized die cooling and is not typical for standard progressive dies. Material cost represents 40% to 60% of the total part cost, so selecting the thinnest gauge that meets structural requirements is critical.
How Much Does Progressive Die Tooling Cost and What Is the Lead Time?
Progressive die tooling cost varies with part complexity, number of stations, and material thickness. A simple die (5 to 8 stations, 0.5 mm thick material) costs $8,000 to $20,000. A medium complexity die (10 to 15 stations, with bending and drawing) costs $25,000 to $60,000. A high complexity die (20+ stations, with cam actions, side piercing, and tight tolerances) costs $70,000 to $150,000. Tooling lead time is 4 to 8 weeks for simple dies, 8 to 12 weeks for medium, and 12 to 16 weeks for complex dies.
The table below summarizes typical specifications for three progressive die classes used at BQUQ:
| Die Class | Stations | Material Thickness | Tolerance | Tooling Cost | Lead Time | Max Part Size |
| Simple | 5-8 | 0.1-1.0 mm | ±0.05 mm | $8k-$20k | 4-6 weeks | 50 x 50 mm |
| Medium | 10-15 | 0.3-3.0 mm | ±0.025 mm | $25k-$60k | 8-12 weeks | 200 x 150 mm |
| Complex | 20-30 | 0.5-6.0 mm | ±0.013 mm | $70k-$150k | 12-16 weeks | 400 x 300 mm |
What Tolerances and Surface Finishes Are Achievable?
Progressive die stamping achieves positional tolerances of ±0.025 mm for standard features and ±0.013 mm for pilot-controlled features. Flatness is held to 0.05 mm per 25 mm length for parts under 1.0 mm thickness, and burr height is controlled to under 10% of material thickness (e.g., 0.03 mm for 0.3 mm thick material). Surface finish on sheared edges is typically 1.6 to 3.2 µm Ra, while formed surfaces retain the raw material finish (e.g., 0.4 µm Ra for cold-rolled steel).
For critical applications, secondary operations like deburring (vibratory or tumbling) can reduce edge burrs to under 0.01 mm, adding $0.005 to $0.02 per part. Electropolishing or passivation for stainless steel parts adds $0.01 to $0.05 per part depending on area. Dimensional stability is excellent: within a single production run, parts vary less than ±0.01 mm, and tool wear can be compensated via die adjustment, maintaining tolerance for 1 to 5 million strokes before re-grinding is needed.
When Should You Avoid Progressive Die Stamping?
Avoid progressive die stamping when production volume is below 10,000 parts per year, as the tooling cost cannot be amortized effectively; consider CNC machining or laser cutting instead. Also avoid it for parts with undercuts that cannot be formed in a single vertical direction without complex cam actions, which increase die cost by 30% to 50%. Parts requiring tight internal corners (radius less than 0.3 times material thickness) or deep draws exceeding 70% of strip width per station are not suitable, as they cause tearing or excessive thinning.
Additionally, materials thicker than 6.0 mm are rarely progressive stamped because press tonnage increases exponentially (e.g., 12 mm thick steel requires over 500 tons for a 100 mm cut length), making hot forging or plate machining more economical. If the part requires a material grain flow orientation (for high-strength fatigue applications), progressive stamping's sheared edges may not provide the desired microstructure; consider forging. Finally, if quick design changes are expected, avoid hard tooling, as die modification costs $2,000 to $10,000 per station.
What Are the Key Design Rules for Progressive Die Parts?
Design for progressive stamping requires maintaining a minimum material thickness of 0.1 mm and a maximum of 6.0 mm. Bend radii must be at least 0.5 times material thickness for soft steels and 1.0 times for aluminum to prevent cracking. Hole diameters must be greater than material thickness, and hole-to-edge distance must be at least 1.5 times material thickness to avoid distortion. Strip width should be minimized while allowing carrier strips of 2 to 5 mm on each side for pilot holes and stability.
Pilot holes must be at least 1.5 mm diameter and placed within 2 mm of the strip edge. Forming directions should ideally be downward (into the die) to simplify the design; upward forms require spring-loaded strippers, increasing complexity. Draft angles of 0.5 to 1 degree are recommended for drawn cups to facilitate ejection. Avoid sharp corners in blank contours; use radii of at least 0.3 mm to reduce die stress and extend tool life from 500,000 to 2 million strokes.
How Do You Calculate Production Cost per Part?
Production cost per part is calculated as the sum of material cost, tooling amortization, press time cost, and secondary operations. For a 0.5 mm thick SPCC steel part weighing 5 grams, material cost is approximately $0.01 (steel at $2,000 per ton). Tooling amortization for a $30,000 die over 500,000 parts is $0.06 per part. Press cost is $0.003 per stroke for a 110-ton press running at 100 strokes per minute, plus labor overhead of $0.01 per part, totaling $0.083 per part. Secondary operations (deburring, cleaning) add $0.02, giving a final cost of $0.10 per part.
For higher volumes, tooling amortization drops significantly: at 2 million parts, amortization is $0.015, reducing total cost to $0.055 per part. Press speed also affects cost: running at 300 SPM instead of 100 SPM triples output per hour, lowering labor cost by 60%. BQUQ recommends quoting at 1 million parts for optimal cost, as this balances die life (typically 5 to 10 million strokes before major maintenance) and amortization.
FAQ
What Is the Maximum Part Size for Progressive Die Stamping?
The maximum practical part size is approximately 400 mm x 300 mm with a thickness of 6.0 mm, limited by press bed dimensions and strip width. Larger parts can be stamped but require presses over 500 tons, dramatically increasing tooling and operating costs. For parts larger than 500 mm, consider transfer die stamping or CNC machining.
How Long Does a Progressive Die Last?
A well-maintained progressive die lasts 5 to 10 million strokes for uncoated tool steel (D2, A2) and 20 to 40 million strokes with carbide inserts. Regular maintenance includes re-grinding cutting edges every 500,000 strokes and replacing wear parts (pilots, springs) every 1 million strokes. At BQUQ, we schedule preventive maintenance after every 250,000 strokes to ensure consistent tolerance.
Can Progressive Die Stamping Produce Parts With Threads?
Yes, thread tapping can be integrated into a progressive die using a tapping station, producing internal threads (M1.6 to M6) at full press speed. This adds one station and increases die cost by $5,000 to $15,000. Alternatively, thread forming (for ductile materials) or thread rolling can be done in-die for external threads.
What Is the Difference Between Progressive Die and Transfer Die Stamping?
Progressive die stamping keeps the part attached to the strip carrier until the final station, using pilot holes for alignment. Transfer die stamping cuts the part free from the strip and mechanically transfers it between stations using fingers or grippers. Progressive dies are faster and more common for small to medium parts, while transfer dies handle larger, more complex parts requiring 360-degree access.
Which Industries Use Progressive Die Stamping Most?
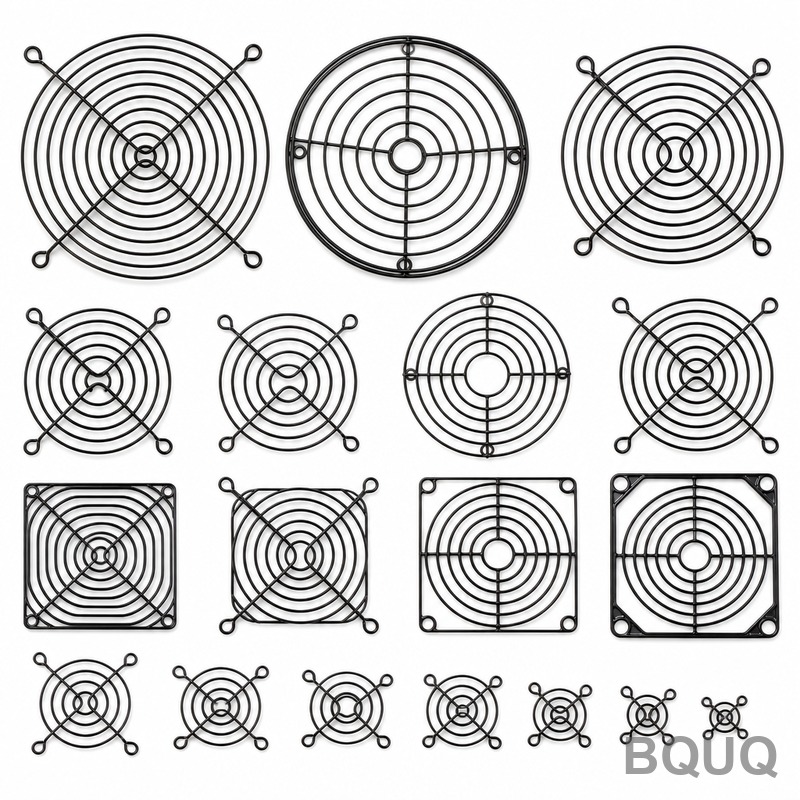
The automotive industry uses progressive dies for brackets, connectors, and heat shields, and the consumer electronics industry for EMI shields, battery contacts, and heat sinks. Medical device manufacturers use it for surgical instruments and implantable device components, while the aerospace sector uses it for light-weight clips and brackets. BQUQ supplies progressive stamped parts to these sectors, with 70% of output going to automotive and electronics.
How Do You Reduce Tooling Cost for a Progressive Die?
Reduce the number of stations by combining operations (e.g., using a single form-and-pierce station instead of separate steps). Simplify part geometry by increasing bend radii and avoiding tight tolerances (±0.05 mm instead of ±0.013 mm reduces grinding cost). Use standard die components (pillars, guides, punches) from catalogs, and select lower-cost tool steel (D2 instead of carbide) for volumes under 2 million parts.
What Press Tonnage Is Required for Progressive Die Stamping?
Press tonnage is calculated by summing the force for cutting (shear strength x cut length x thickness), forming, and stripping. For example, cutting a 100 mm perimeter in 1.0 mm thick SPCC (shear strength 350 MPa) requires 35 tons, plus 20% stripping force, totaling 42 tons. Rule of thumb: 1 ton per 2.5 mm of cut length for 1.0 mm steel. BQUQ uses presses from 25 to 600 tons, with 110-ton models being the most common for medium parts.
Conclusion
Progressive die stamping is the optimal manufacturing process for high-volume, precision metal parts between 0.1 mm and 6.0 mm thick, delivering tolerances of ±0.025 mm and production rates up to 1,500 parts per minute. The key to cost-effectiveness is volume: with tooling amortized over 500,000 parts, unit costs drop below $0.15 for most geometries. At BQUQ, our 20 years of experience in progressive die design, including heat sink assembly and connector terminals, ensures robust tooling that meets your tolerance and lead-time requirements. For a detailed feasibility review and quote, our engineering team responds within 12 hours. Contact us at sc@bquq.com, WhatsApp +86 13713157787, or visit www.bquq.com.